The Chicken Ladder
Every coop needs at least one ladder. They look just so darn adorable. At least whilst they are clean. I have one inside my coop so that my girls can get to their roost bars- if they choose not to or can not fly up.
Here are the instructions for my very basic ladder:
1. Materials required: Timber for the rungs and rails of the ladder. I used what I had in the shed- 1.5 m tall tomato stakes for the rails and leftover 30 x 30 mm timber for the rungs. And of course exterior grade screws to suit your timber type and thickness.
Tools required: A drill, appropriate drill bits (remember you will need to make pilot hole so that it is easier to drill the screws in) and a saw (if you don't have your pieces pre cut, for example, from the timber yard) and safety equipment if using the latter i.e. gloves, eye goggles, ear protection and a dust mask.
2. Lay all the timber out as shown in the picture below. I kept the rung spacing as equal as possible.
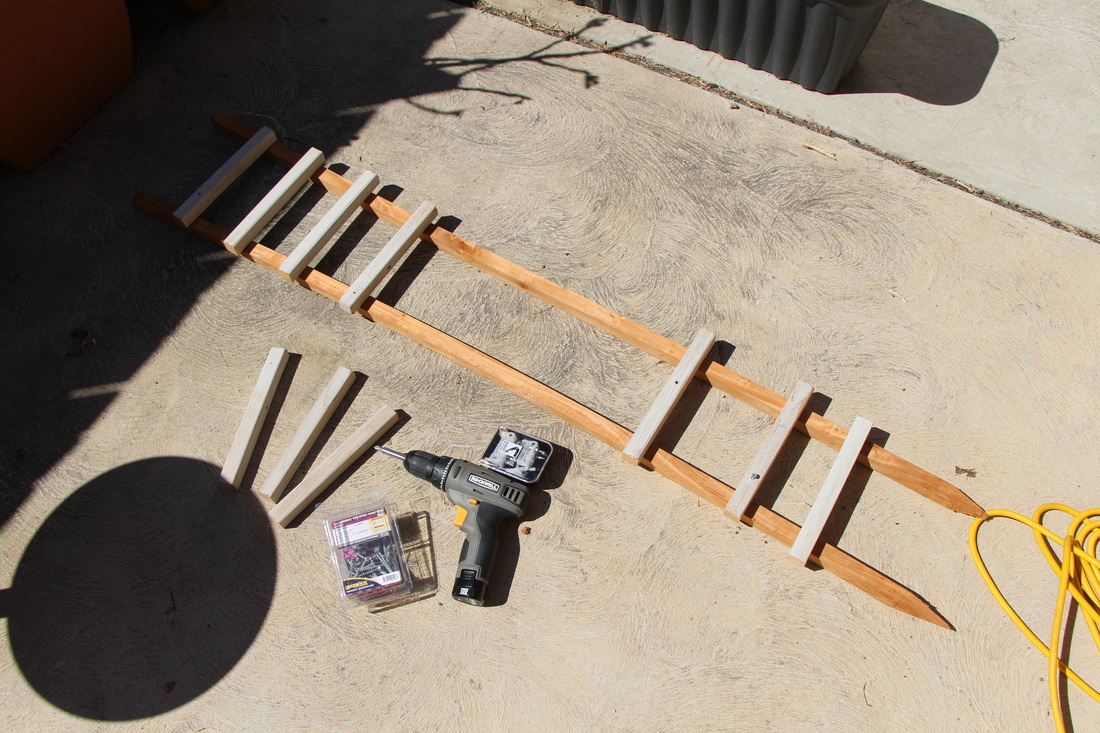
Steps 1 and 2.
3. Drill your pilot holes and screw in the rungs onto the rails.
4. Place finish ladder in your desired location. You could paint the timber before/after assembly but I was in a hurry to get this done.
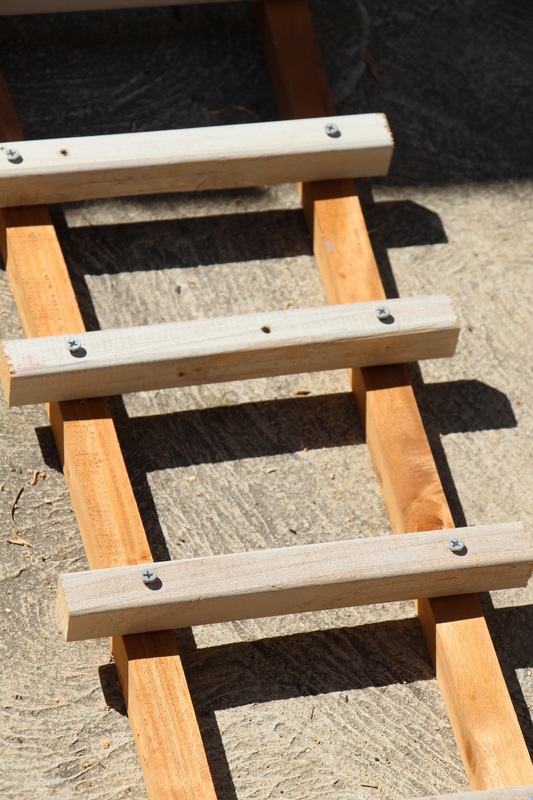
Step 3.
|
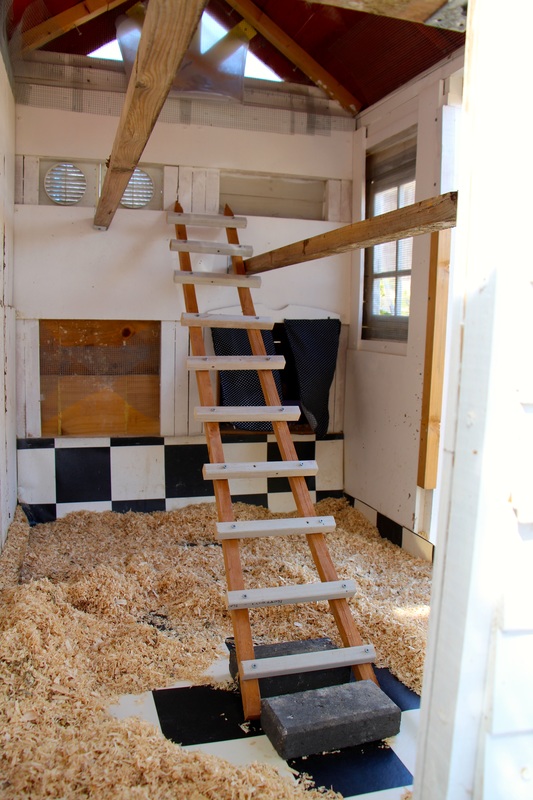
Step 4.
|
