Brooder Boxes
Brooder Box #1 |
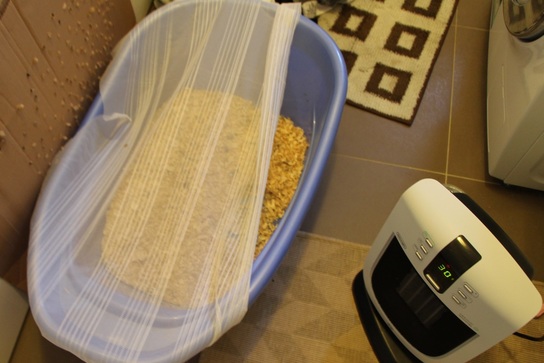 A baby bathtub in a warm room worked surprisingly well. Although running a heater all day probably means it is not cost effective!
My temporary brooder box setup was a baby bathtub in the laundry room. I was forced to set up this brooder 'box' when I realised that the globe holder on my proper brooder box was broken. The entire room was heated to keep the chicks warm using a fan heater that was set to 30-32 degrees Celsius (the room temperature was probably at least 28 degrees Celsius). The tub was lined with a thick layer (about 10 cm) of pine shavings so the chicks would not slip in the bathtub. I also placed a dish of water with pebbles in it to prevent the chicks from drowning (the water needed to be replaced several times a time to keep it clean) and a dish of medicated (to protect from Coccidiosis) chick starter feed (you could opt for unmedicated feed). To contain the chicks (because they could jump at 1 week of age!) I used a lace curtain remnant tautly draped over the tub.
I did turn the lights off at night which caused the chicks to cheep madly. After a few minutes though they would stop cheeping- I presume because they were sleeping.
I did turn the lights off at night which caused the chicks to cheep madly. After a few minutes though they would stop cheeping- I presume because they were sleeping.
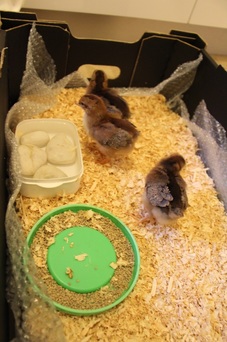
The chicky play pen. I lined a vege box with plastic and then layered on the pine shavings. I kept water and food accessible as they like to eat and drink often.
|
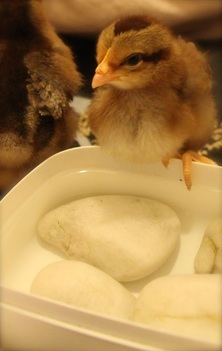
The water dish with little stones to keep chicks from getting stuck in the dish.
|
Brooder Box #2
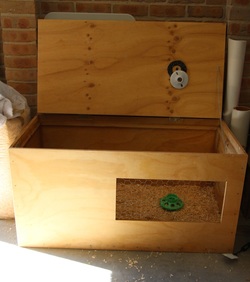
The proper Brooder Box. I picked this up second hand. Incredibly solid as it is 2 layers of plywood with a styrofoam core to provide insulation. It has a little window covered in chicken wire (so NOT predator proof). And a very solid lid through which the wiring for the globe runs through (which at present is non functional!). This Brooder Box lives in the garage as it is BIG.
There are things though that I would change- I plan to flip it so that the chicken wire section is on top (i.e. the roof) so that there is ventilation at the top to eliminate the problem of drafts at chicken level. The heat lamp will be attached through this point too. At present, I have to cover up the chicken wire opening with one end of an old towel whilst the other end of the towel is used to keep the lid ajar. When I do flip the box around, I plan to attach legs or wheels to the Box. I am hoping to keep the lid but think this might not be practical. If this is the case then I will probably replace it so that it opens up like wardrobe doors (maybe with perspex so that I can see the cute fluff balls inside). And of course, there is always the need to make it look prettier so a good coat of paint inside and out is planned. And I love vinyl flooring so that is definitely going in as it makes cleaning up super easy. Creating more work for myself!
There are things though that I would change- I plan to flip it so that the chicken wire section is on top (i.e. the roof) so that there is ventilation at the top to eliminate the problem of drafts at chicken level. The heat lamp will be attached through this point too. At present, I have to cover up the chicken wire opening with one end of an old towel whilst the other end of the towel is used to keep the lid ajar. When I do flip the box around, I plan to attach legs or wheels to the Box. I am hoping to keep the lid but think this might not be practical. If this is the case then I will probably replace it so that it opens up like wardrobe doors (maybe with perspex so that I can see the cute fluff balls inside). And of course, there is always the need to make it look prettier so a good coat of paint inside and out is planned. And I love vinyl flooring so that is definitely going in as it makes cleaning up super easy. Creating more work for myself!
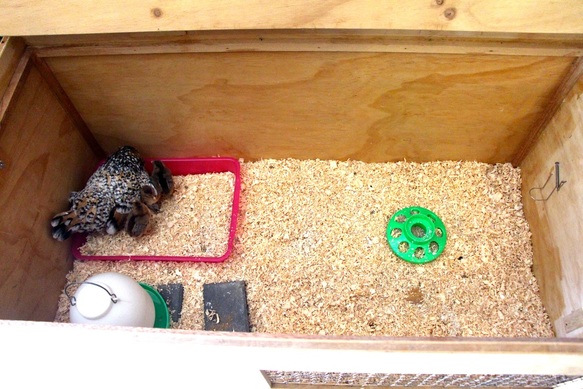
My Belgium bantam with her 3 adopted Welsummer chicks. The 'nest box/tray' has been placed away from the drafty window. The water is kept on a paving brick to help keep the water relatively clean. The chicks can drink without any hassle and can always jump onto the exposed bits of the brick if they wanted to. I keep the feed on a brick too but have moved it for the picture.
